Sunday, 12 May 2013

Baked Beans

It's time to be honest, this was one item on my Bucket List that I really wasn't fussed about making, but Rory loves these and until recently it was impossible to get anything here that even vaguely resembled them. Since making my list though, we have found a few special import stores that have them and even a local variety which fills the need. However, by the time we found these they were already on my list so, here goes...


* Special Note for my sister Jo who reads my blog and decides everything I make takes too long, this is not one you'll want to even consider.

Baked Beans
Serves: 8
Prep/Cook Time: 3hrs (a lot of the steps can be done while the beans cook so I grouped these for this recipe) However the prep really only takes 30 mins.

500g white beans
1/2tsp bicarb
700g crushed tomatoes (Roma tomatoes are best, I used a mix this time which is why my sauce is quite orange, Roma would keep the red colour better)
2tbsp oil
Handful of mixed herbs (thyme, rosemary, sage)
3 cloves garlic
1 onion
2 cloves
1/4tsp mustard powder
150g bacon
4tbsp Worcestershire sauce
2tsp Tabasco sauce
1/4 cup sugar


1. Soak the beans in cold water overnight, the water level should be about 3 inches above the height of the beans. Place beans and the water from soaking into a large pot with the bicarb and cook for 1 1/2hrs on a medium heat until they are tender. Drain the beans reserving 1 cup of the liquid.

2. While the beans are cooking blanch the tomatoes. Using a knife make a small cross on each tomato, place into boiling water for about 2mins or until you see the skin peeling away. Remove and submerge in ice water for 2 mins, the skin should then just peel back from the flesh. Put all the tomatoes in a blender and mix until a fine liquid sauce is made.

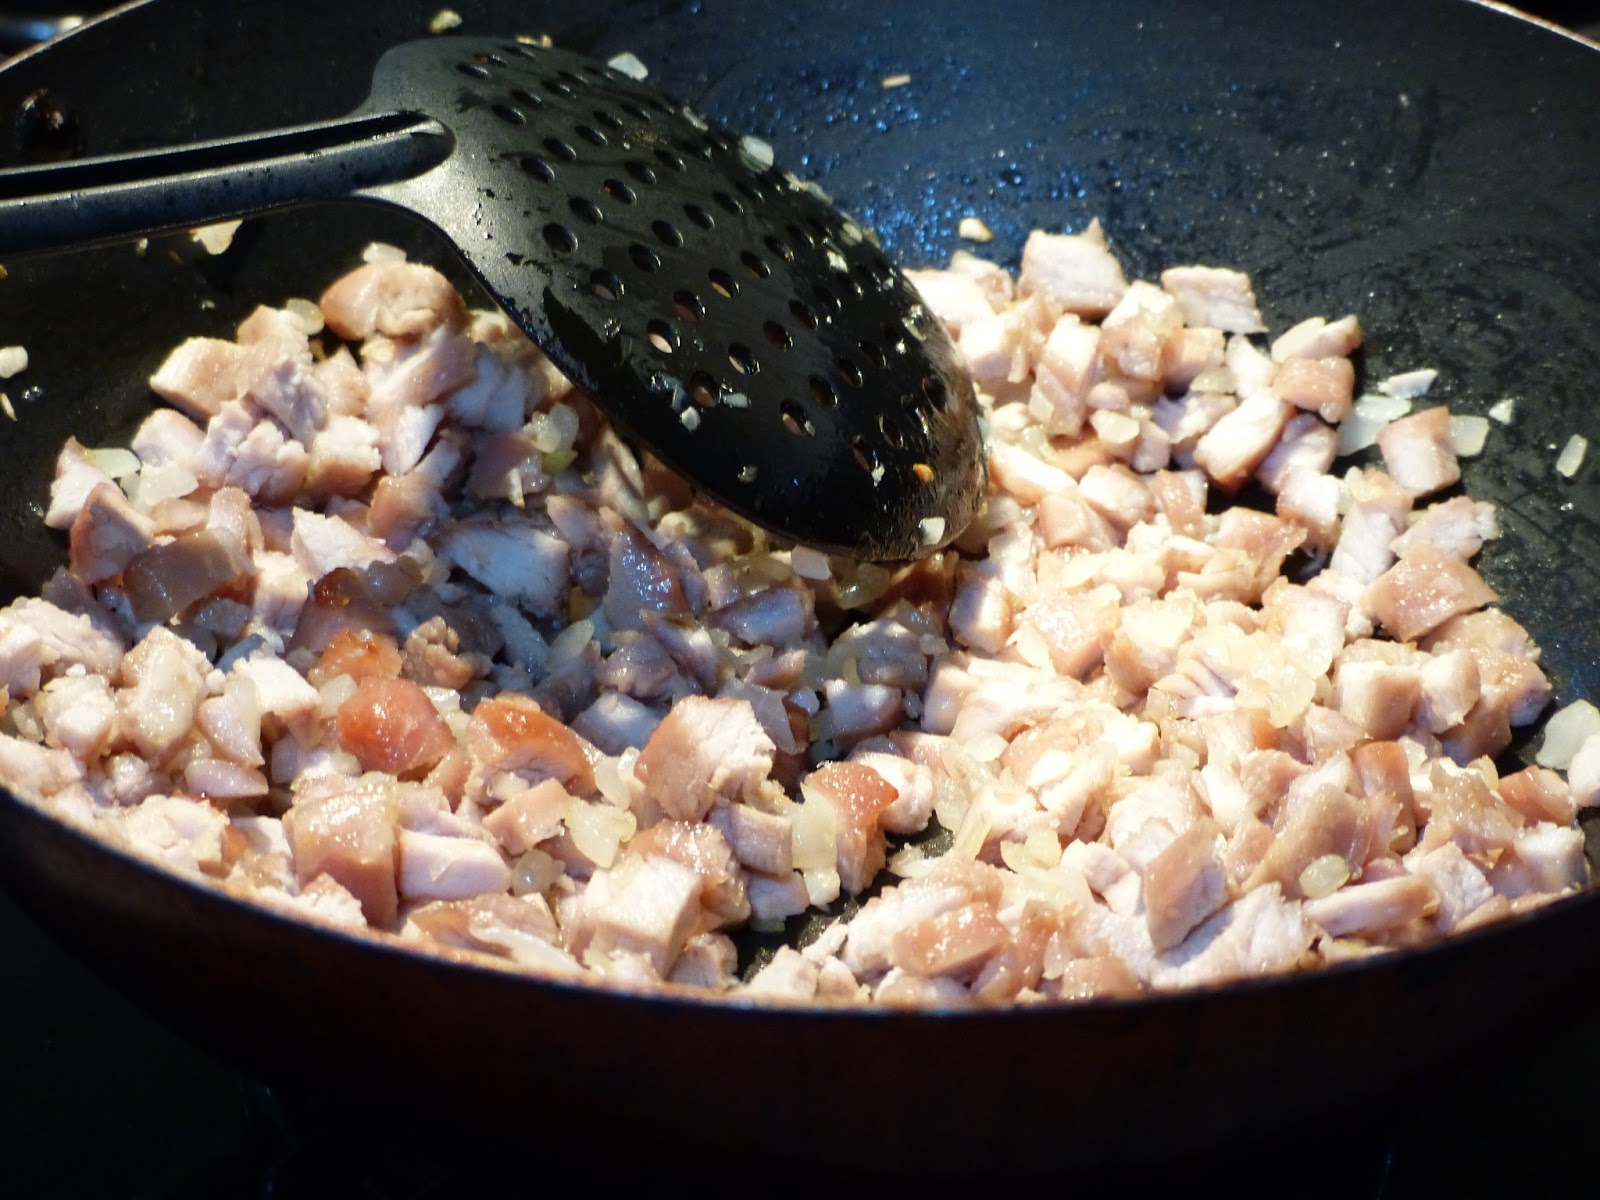
3. Heat the oil in a pan/wok and saute the onion, garlic, herbs, cloves and mustard for 10mins. Add this mix to the blender with the tomatoes and mix on high until smooth. 


4. While the other ingredients are in the blender, quickly fry the bacon then pour the sauce into the pot and add the Worcestershire sauce, Tabasco and sugar. Stir and simmer for 30mins.


5. Pour the sauce into the drained beans adding the 1 cup of water reserved after boiling. Mix thoroughly and cook on a low heat for approximately 1hr.


The intent was to have these for breakfast tomorrow morning but Rory is impatient so he had them over baked potatoes for dinner. The verdict: "They is nummy" which I think translates to: I did an OK job.

Saturday, 11 May 2013

Rich Chocolate Truffle Pie

After planning my roast dinner and Yorkshire Puddings tonight I decided that I would need a nice dessert to go with it. For my Mum of course, there was no benefit to me whatsoever...
Well except for the fact that I would have to eat her slice as sending it wasn't such a great idea. :)


Rich Chocolate Truffle Pie
Serves: 12-16
Prep/Cook Time: 20mins (plus 8 hours to set)

Pie Crust:
400g chocolate biscuits (I used choc chip as they were all I could find here that weren't cream filled)
1/2 cup melted butter
4 tbsp sugar
1 tsp vanilla

1. Preheat oven to 350F.

2. Process the biscuits in a blender until they are crumbed. Then in a small bowl mix together the biscuit crumbs, sugar, butter and vanilla.

3. Press the mixture firmly and evenly against the sides of the pie tin. Bake in the oven for 10 mins and set aside to cool.


Filling:
3 cups dark chocolate
3 cups whipping cream
1tbsp vanilla extract
mint essence (as per your own taste)
1/2 cup icing sugar

1. Place all the chocolate and half the cream into a glass dish. Cook on high in the microwave for 3 mins, stirring every 30 seconds.


2. Stir in vanilla, mint and sugar then set aside to cool.

3. In a small bowl beat the remaining cream until soft peaks form. Beat on high speed while gradually adding the chocolate mixture 1/3 at a time. Mix well then spoon into the crust.


4. Refrigerate for at least 8 hours.


The original recipe didn't have the mint, but as my two favourite sweet things in this world are mint and chocolate I decided it would make a delicious addition. If the clean plates after eating this are anything to go by then I'd say it was an inspired choice!


Yorkshire Pudding

Tomorrow (today in Australia) is Mother's day and I am a long way away from my Mum so I decided as a tribute to her this Mother's Day that I would try my hand at something from her hometown... Yorkshire Puddings.


Yorkshire Puddings
Serves: 12
Prep Time: 5mins (plus time to let the batter stand) Cook Time: 20mins

4 eggs
200ml milk
pinch of salt
3/4cup flour
Oil

1. Place eggs, milk and salt in a bowl and beat with an electric mixer. Let the mix stand for 5-10 mins until the bubbles disappear

2. Add the flour to the egg mix and beat on high until everything is mixed together. Leave the bowl to sit in a cool place (not the fridge) for at least 1 hour, but this can be left overnight. Just before you are ready to cook, preheat the oven to the highest temperature.

3. Take a muffin tray and place a drop of oil in the bottom of each cup. Put the tray in the oven and leave for 5 mins until the oil is almost smoking.

4. Remove the tray from oven and 1/3 fill each cup with the pudding mix (as you pour it in you should hear a sizzle from the oil) then return the tray to the oven and cook for approximately 15mins.
5. Serve with a roast dinner and don't forget the gravy!

An easy to make side dish that went beautifully with my roasted pork belly.

Happy Mother's Day Mum! You would have loved them!

Sunday, 10 February 2013

Steamed Pork Buns - Char Siu Bao

Gong Xi Fa Cai! Before moving to Colombia I lived in Singapore and was exposed to so many gastronomical delights. I decided as it's Chinese New Year I should try my hand at one of my favourites from this time... Steamed Pork Bun otherwise known as Char Siu Bao.

This one was going to take some improvising as so many of the recipes I looked for called for things I just can't get but as always I persisted and pulled together ideas from one recipe or another and finally landed on this. Which even if I do say so myself was pretty impressive.

As good as I remembered it...

Steamed Pork Bun
Serves: 10
Prep Time/Cook Time: 2hrs (This is a little complicated on this one as I did lots of stuff while waiting for other parts to be ready, at the end of it all I'm pretty sure I was only in the kitchen for about this long...)

For the Char Siu:
500g Pork loin (a few recipes suggested pork belly but I already had loin so I went with that)
1/4 cup sugar
2tsp salt
4tsp light soy sauce
1tbsp Gin (the recipe calls for Sherry or chinese rice wine, Gin is apparently a perfect substitute)
1/2tsp oil
2tbsp honey

1. Cut the pork loin down the centre to butterfly it and then make deep slashes on opposite sides to allow the marinade to get into the meat.
2. Place all other ingredients in a glass dish. Lay the meat on top and coat generously with the marinade. Cover with plastic and leave for 30mins.
Meat ready to marinate
3. Preheat the oven to 180C, Line a roasting dish with foil, lay the meat in the pan and roast for about an hour. Turn occasionally and baste with the juice.
Cooked and ready for dicing
4. Set aside for 10 minutes and then dice into small 1/2cm pieces.

For the dough:
2 cups plain flour
2 1/2tsp baking powder
2tbsp caster sugar
1tsp salt
1/2 cup warm water
2tbsp oil

1. Sift the flour and baking powder in a bowl, add the sugar and salt. Gradually add the combined water and oil. Stir to form a soft dough.
2. Turn onto a lightly floured surface and knead until smooth. Wrap dough in plastic wrap and refrigerate for an hour.
Doughy goodness

For the filling:
1/2 cup chicken broth
1tbsp fish sauce
2tbsp tomato sauce
5tsps sugar
4tsps cornstarch
5tbsp soy sauce
1/2 tsp salt
pinch of pepper
2tbsp oil
1 small onion finely diced
500g Char Siu Pork finely diced
1tbsp Gin (see note above)

1. Whisk the chicken broth, fish sauce, tomato sauce, sugar, cornstarch, soy sauce, salt and pepper in a bowl.
2. Place the oil in a wok and heat on high. When hot, add the onion, reduce the heat to medium low and allow onion to brown.
2. Turn the heat back to high, add the meat and stir fry for 3 minutes. Pour the Gin in from the edge of the wok and stir.
Preparing the filling
3. Reduce the heat to medium and pour the broth mixture into the wok and stir together until the sauce thickens.
Waiting for the sauce to thicken
4. Remove from heat.

For the buns:
1. Divide the dough into 10 equal portions (keep them moist by placing them under a damp cloth until needed). Roll out one portion at a time into a large circle.
2. Place a spoonful of filling into the centre of the dough then pull the sides up creating small pleats. Twist the pleats together at the top.
All pleated up
3. Place each bun on a small sheet of wax paper and place into the bamboo steamer. Allow to steam for 10 minutes (note: the buns will puff out so don't place them too close together in the steamer).
4. Enjoy.

Yes this was a rather fussy thing to make, but it was definitely worth the time. The taste was just as I remembered it, the only "glitch" was that my dough was not the pristine white that they always were in Singapore. I'll get over it! I loved this dough as it didn't force you to use yeast and go through the proofing process. Always a bonus when cooking at altitude.

Sunday, 20 January 2013

Lemon Meringue Pie

So here it is, the most anticipated recipe of the weekend. As I explained in my post about the brownies, I was handed a bag of lemons the other day. Now while most people's response to that would be - TEQUILA! I knew it could only mean one thing. I had to make pie. To say I was fearing this would be an understatement. First, take into account that everyone likes their pie with different degrees of tartness, add to that the various ways people prefer their meringue and finally put on top the fact I've never made anything like it... Recipe for disaster! My friends are lucky I love them!
Not too bad even if I do say so myself!

Lemon Meringue Pie
Serves: 12 (maybe more maybe less) I used a 23cm pie dish  so it really comes down to how big your slices are
Prep Time: 1 hour (plus extra for cooling) Cook Time: 40mins

For the Base:
2 1/4 cups plain flour
3tbs icing sugar
190g chilled butter (chopped)
3 3/4tbs chilled water

1. Place icing sugar and flour in a bowl, rub the butter into the flour mix until it looks like fine breadcrumbs.
2. Add the water and use a spatula to stir until a dough forms. Use your hands to bring the dough together. Turn onto a worktop and roll out to 5mm thickness. Line your pie dish and trim the excess. Place dish into the fridge to cool for 30mins
3.Preheat oven to 180C. Cover the pastry with baking paper and weights (I used beans because they're all I had). Bake for 15mins, remove weights and paper cook for a further 15-20mins, or until crisp and golden. Allow to cool. (I made this the day before just to give me a bit more time).
First time using my new pie dish and I must say I am impressed

For the Filling:
75g cornflour
3/4cup water
1 1/2 cups lemon juice
Zest of 1 lemon
1 1/2cups caster sugar
90g butter
6 egg yolks

1. Combine the cornflour, water, lemon juice, zest and sugar in a saucepan. Use a whisk to stir over medium heat for 4mins or until boiling. Continue cooking and stir constantly for another minute. Remove from heat, whisk in butter and egg yolks. Pour mix into a bowl, cover and put in the fridge for 3hrs or until completely cool.
Zesty lemony goodness

For the Meringue:
6 egg whites
1 1/2cups caster sugar

1. Preheat oven to 190C. Use an electric beater to beat the egg whites in a clean dry bowl until soft peaks form. Add the sugar one tbsp at a time until the mix is thick and glossy.

Making the pie:
Spread the filling over the base of the pastry case. Spoon the meringue mix over the top, making sure it goes out to the edges. Use the back of a spoon to form peaks. 
Pie - pre oven
just so I had proof it looked good at one point in case the meringue collapsed

Bake in the oven for 5 mins or until the meringue peaks are light golden. 
Set aside to cool.


For all the fear I had of this dish, it wasn't too bad to make, but it was time consuming and a little stressful - I sat on the floor of my kitchen watching the meringue cook just to be sure it didn't burn. Also evidenced by my lack of photos during the process, always a sign that I am preoccupied.
It hasn't had a taste test yet either but my friends will be here soon so time will tell. I guess if they don't like it they can always make their own and show me how it's done...

Braided Fruit Loaf

I love bread, have I mentioned this before? The trouble is the bread here is sweet and well, awful! The altitude messes with the rising process and it seems the bread will either taste yeasty or they'll have loaded it with sugar so that you can't taste the yeast. As a result I bought myself a bread maker for those times that I want a fix of what bread is meant to be like. However, as this is a bucket list item and it infuriated me (when I didn't have a bread maker) when a recipe called for proofing the loaf in a bread maker, I have made this loaf from scratch. The sun was playing hide and seek this morning so I had some trouble getting things to work, but nothing that sitting the dough in front of a hot oven can't fix.

I love bread...


Braided Fruit Loaf
Serves: 2 loaves (or 1 with a 6 strand plait)
Prep Time: 2 1/2 hours (includes proofing x2) Cook Time: 45mins

120g butter
1/3 cup milk
1/3 cup caster sugar (we can't get this here so I throw normal sugar in the blender for 10 seconds)
2 2/3 cups flour
1tbs dried yeast
3 eggs (beaten)
1 cup dried apricots (chopped)
1tbs flaked almonds

1. Melt butter with milk and sugar in a saucepan on low, stir until sugar is disolved. Cool until lukewarm.
Getting ready
2. Place flour and yeast in a bowl and mix together. Add the eggs (keep 1 tbsp to brush) then the milk mixture, beat for 10 minutes until dough is soft and elastic.
3. Place on a floured surface, shape dough into a rectangle, scatter 1/3 of the apricots then fole the dough over. Repeat until all the apricots have been used. Knead for 2 mins.
Adding the apricots
4. Make a ball and place it in a lightly oiled bowl and cover with lightly oiled plastic wrap. Let stand in a warm place for 1hr (or until doubled)
Plaiting, easy when you know how!
5. Punch down dough and divide into 6 pieces. Roll each into a long strand. Press the tops together and form the loaf by creating a 6 strand plait. (Alternatively make 2, 3 strand plaits). Place the dough onto a baking tray, double lined with baking paper, cover again and leave to proof once more.
Ready for baking
6. Preheat the oven to 180C, brush the loaf with the reserved egg and sprinkle flaked almonds on top. Bake for 40-45mins until lightly golden. I was worried about this bread not being cooked so I checked online and discovered an internal temp of 190/200F is right for a loaf so I went with that.
All done
7. Cool on a wire rack.

This smelt great, it hasn't had the taste test yet as it's being served this afternoon, but if appearance counts for anything, then it's a winner. I'm hoping if this looks good enough, when my meringue is a flop, no one will notice.

    Saturday, 19 January 2013

    Tandoori Salmon

    I warned you it was a bucket list kind of weekend... Here's item 2 of the 4 I have planned. I decided Rory and I should have something nice for dinner and this seemed like an easy way to get this. We actually picked up some tandoori powder (ok some might be a slight understatement, try 5 boxes) while we were in Australia, but should we use all of that up before we get chance to replenish supplies, then I thought I'd try making the powder from scratch.

    Dinner, just delicious.

    Tandoori Salmon
    Serves: 2
    Prep Time: 5 mins (plus 4+ hours to marinate) Cook Time: 10 mins

    500g salmon
    150g yoghurt
    1tbsp lemon juice
    1 clove garlic minced
    2tsp ginger powder
    1tsp cumin
    1tbsp paprika
    1/2tsp turmeric
    pinch of salt and pepper
    pinch of cilantro

    1. Prepare salmon into 2 fillets and place skin side down in a glass dish.
    2. Mix together all the remaining ingredients to form the tandoori paste.
    3. Pour paste over the top of salmon and make sure they're completely coated. Cover the dish with plastic wrap and place in the fridge for at least 4 hours (no longer than 24)
    Fillets marinated and ready for refrigeration

    4. Take fillets out, remove excess marinade and place them, skin side up, on a greased grill for 5 mins.
    5. Turn fillets over and baste with remaining paste. Grill for a further 5 mins or until the salmon flakes apart when tested with a fork.
    6. Sprinkle top of fillet with cilantro.

    This was delicious! Better than the packet stuff (even if I do say so myself). We had it with hasselback potatoes, sprinkled with paprika to keep with the theme. I had wanted to have asparagus with it but I'm beginning to think the supermarkets here make a choice between asparagus and lemons... Regardless, divine.