Showing posts with label Bucket List. Show all posts

Sunday, 28 December 2014

Honey and Lime Tilapia

Christmas, a time for indulgence, a time for excessive eating, a time for that to stop. 

I need vegetables, I need salad, I need fresh...
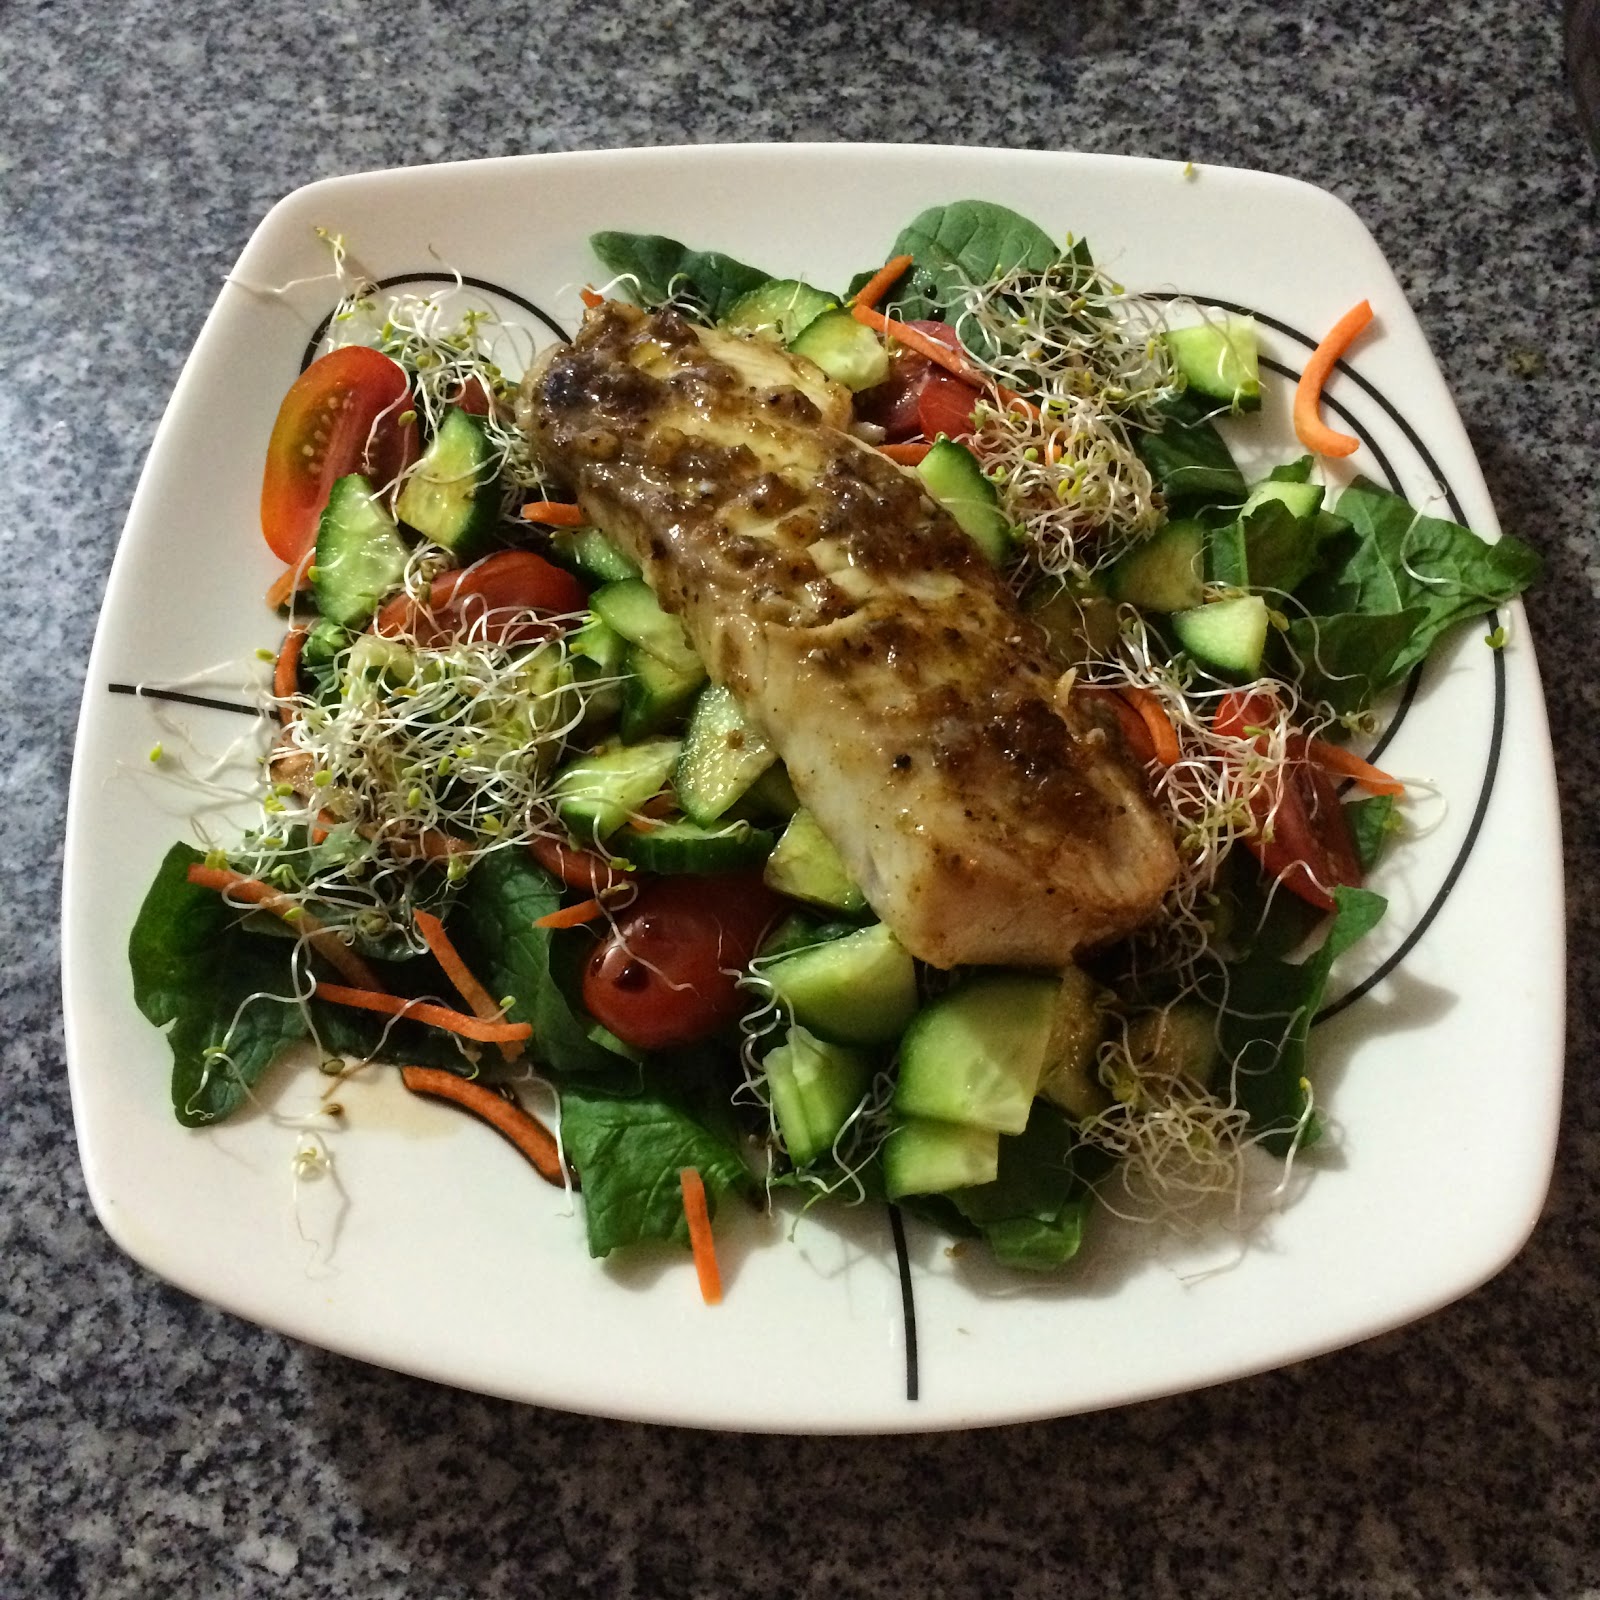


Honey and Lime Tilapia
Serves: 4
Prep Time: 5mins (plus at least 1 hour for marinading) Cook Time: 10mins

Marinade
4 Tilapia Fillets (around 400-500g)
Juice & zest of 1 lime
1 tbsp olive oil
1 1/2 tbsp honey
1/2 tsp salt
1/2 tsp cracked pepper
1 clove of garlic (finely minced)

1. In a small bowl, whisk together the lime juice, zest, olive oil, honey, salt, pepper and garlic. 
2. Place the tilapia in a zip lock bag and pour the marinade on top of the fish. Remove the air from the bag and seal.

3. Place in the refrigerator for at least an hour. Be sure to shake the marinade around the bag a few times to ensure an even coating.
4. Place fillets into a hot frying pan and pour the marinade over the top, cook for 3-5mins on each side, turning just once.
5. Serve with salad

The original recipe I adapted this from also had a coating on the fish, I decided to cook it both ways just to see which I preferred.
With coating
Coating (optional)
1/2 cup plain flour
1/4 tsp salt
1/4 tsp pepper

1. In a small bowl, whisk together the lime juice, zest, olive oil, honey, salt, pepper and garlic. 
2. Place the tilapia in a zip lock bag and pour the marinade on top of the fish. Remove the air from the bag and seal.
3. Place in the refrigerator for at least an hour. Be sure to shake the marinade around the bag a few times to ensure an even coating.
4. Mix together the ingredients for the coating and place on a plate. 
5. Heat 1-2 tbsp of olive oil in a large frypan. 
6. Dredge each fillet in the flour, coating both sides. Cook the fillets in the oil for 3-5mins on each side, turning only once.

Both were absolutely delicious, the marinade took on a beautiful flavour and gave a slight crispness to the edge of the fish. Given the choice I would probably forget the coating next time, for a fresher lighter tasting fish. Either way was a winner though!


Saturday, 27 December 2014

Quinoa and Apple Salad

I am a fan of quinoa, I'm a big fan of popped quinoa, mostly because I can buy it like that and I don't need to cook it. This recipe makes a massive number of servings, which is great when you're going to lunch with 20 people not so great when you're cooking at home for two people... 

So easy and so delicious


Quinoa and Apple Salad
Serves: 20 (as a side dish)
Prep Time: 5-10 mins Cook Time: 0

100g Popped Quinoa
1 cup almonds (roughly chopped)
2 green apples (diced into 1/2 inch cubes)
Lemon/Lime juice
1 cup dried cranberries
Parsley leaves
100g blue cheese
1/2 cup olive oil
2tbsp balsamic vinegar

1.   Core both apples, and cut into ½-inch cubes. Toss them immediately into a medium-sized bowl with the lemon juice and enough water to cover.
2.  In a bowl, whisk together the olive oil and balsamic vinegar.
3.  Roughly chop the almonds then place them into a medium skillet set over medium heat. Cook, shaking the skillet often, until toasted.


4.   Transfer almonds to a large bowl along with the quinoa and cranberries. Pour the olive oil/balsamic vinegar over the top and give everything a good stir. Drain the apples and add them along with the cheese and parsley. Toss well. 

Feel free to adjust the ingredients according to what you like and obviously how many servings you need. I have reduced the amount of olive oil and balsamic that I used the first time, but still think I could get away with a bit less.

What else do you have at Thanksgiving besides
an apple pie made to look like a turkey
I actually made this for the first time back at Thanksgiving, but I wasn't really thinking straight that day... I blame that on being focussed on my turkappley pie... 

The salad was a big hit which was why I went for a repeat at Christmas, again it was really popular so I figured it was time to share.

Friday, 26 December 2014

Mint Cheesecake & Chocolate Mousse Christmas Tree

OK so let me start by saying I love the holiday season. It's the opportunity to do the things I'd never normally have time for, like attempting this only there was a couple of issues in having this for Christmas Day.  


1) I do not own, nor could I find, a buche pan 

2) Using a loaf pan was not good enough in my mind (yes my mind is a little crazy sometimes)

3) Christmas Day was just going to be Rory and I... This seemed a little excessive for us


Solution:

1) Forget the buche pan

2) Buy a Christmas Tree tin, that shouldn't pose any unnecessary challenges!

3) We're off later this afternoon to a communal "pot luck" Christmas lunch on Boxing Day with a whole bunch of guinea pigs (erm, I mean friends) so no more excuses...


Mint Cheesecake & Chocolate Mousse Christmas Tree
Serves: 20 (or more depending on how big you slice)
Prep/Cook Time: 1 1/2 hrs plus time in between to cool (at least 8 hrs). I actually made my layers on different days so this is all a bit hard to judge.

Mint Cheesecake Layer
500g white chocolate chips
440g cream cheese
400ml condensed milk
2/3 cup water
28g unflavoured powdered gelatin
1 cup heavy cream
Peppermint extract (to your liking)
Green food colouring (to your liking)


1. In a large glass dish, melt the white chocolate in the microwave at 30 second intervals, stirring between each. 
2. When the chocolate has melted and is smooth, add in the cream cheese and beat with an electric mixer. 
3. Add in the condensed milk and beat until smooth.
4. Combine the water and gelatin in a small microwaveable dish and let stand for 1 minute before heating until liquified (5-10 seconds) in the microwave. Then add to the other ingredients, stirring gently.
5. Pour in the cream and mint and mix with a handheld mixer on low speed until just incorporated. While mixing add in the colouring.
6. Line the bottom of your tin with paper and pour the mixture into the tin. (Ignore the plastic in the photos, that was a failed idea before I switched to paper...) 
7. Put the tin in the freezer while making the next layer or overnight.


Chocolate Mousse Layer
2 tsp powdered gelatin
2 tbsp cold water
4 egg yolks
1/2 cup sugar
1/2 cup hot milk (microwave for 30sec)
45o g chocolate (chopped)
1 1/2 cups whipping cream

1. Pour the water into a small saucepan and sprinkle over the powdered gelatin. Allow to stand for 1 minute. Then whisk in the eggs and sugar before stirring in the hot milk.
2. Cook over a medium heat, stirring constantly. Mixture should thicken enough after 5 minutes to coat the back of a spoon.

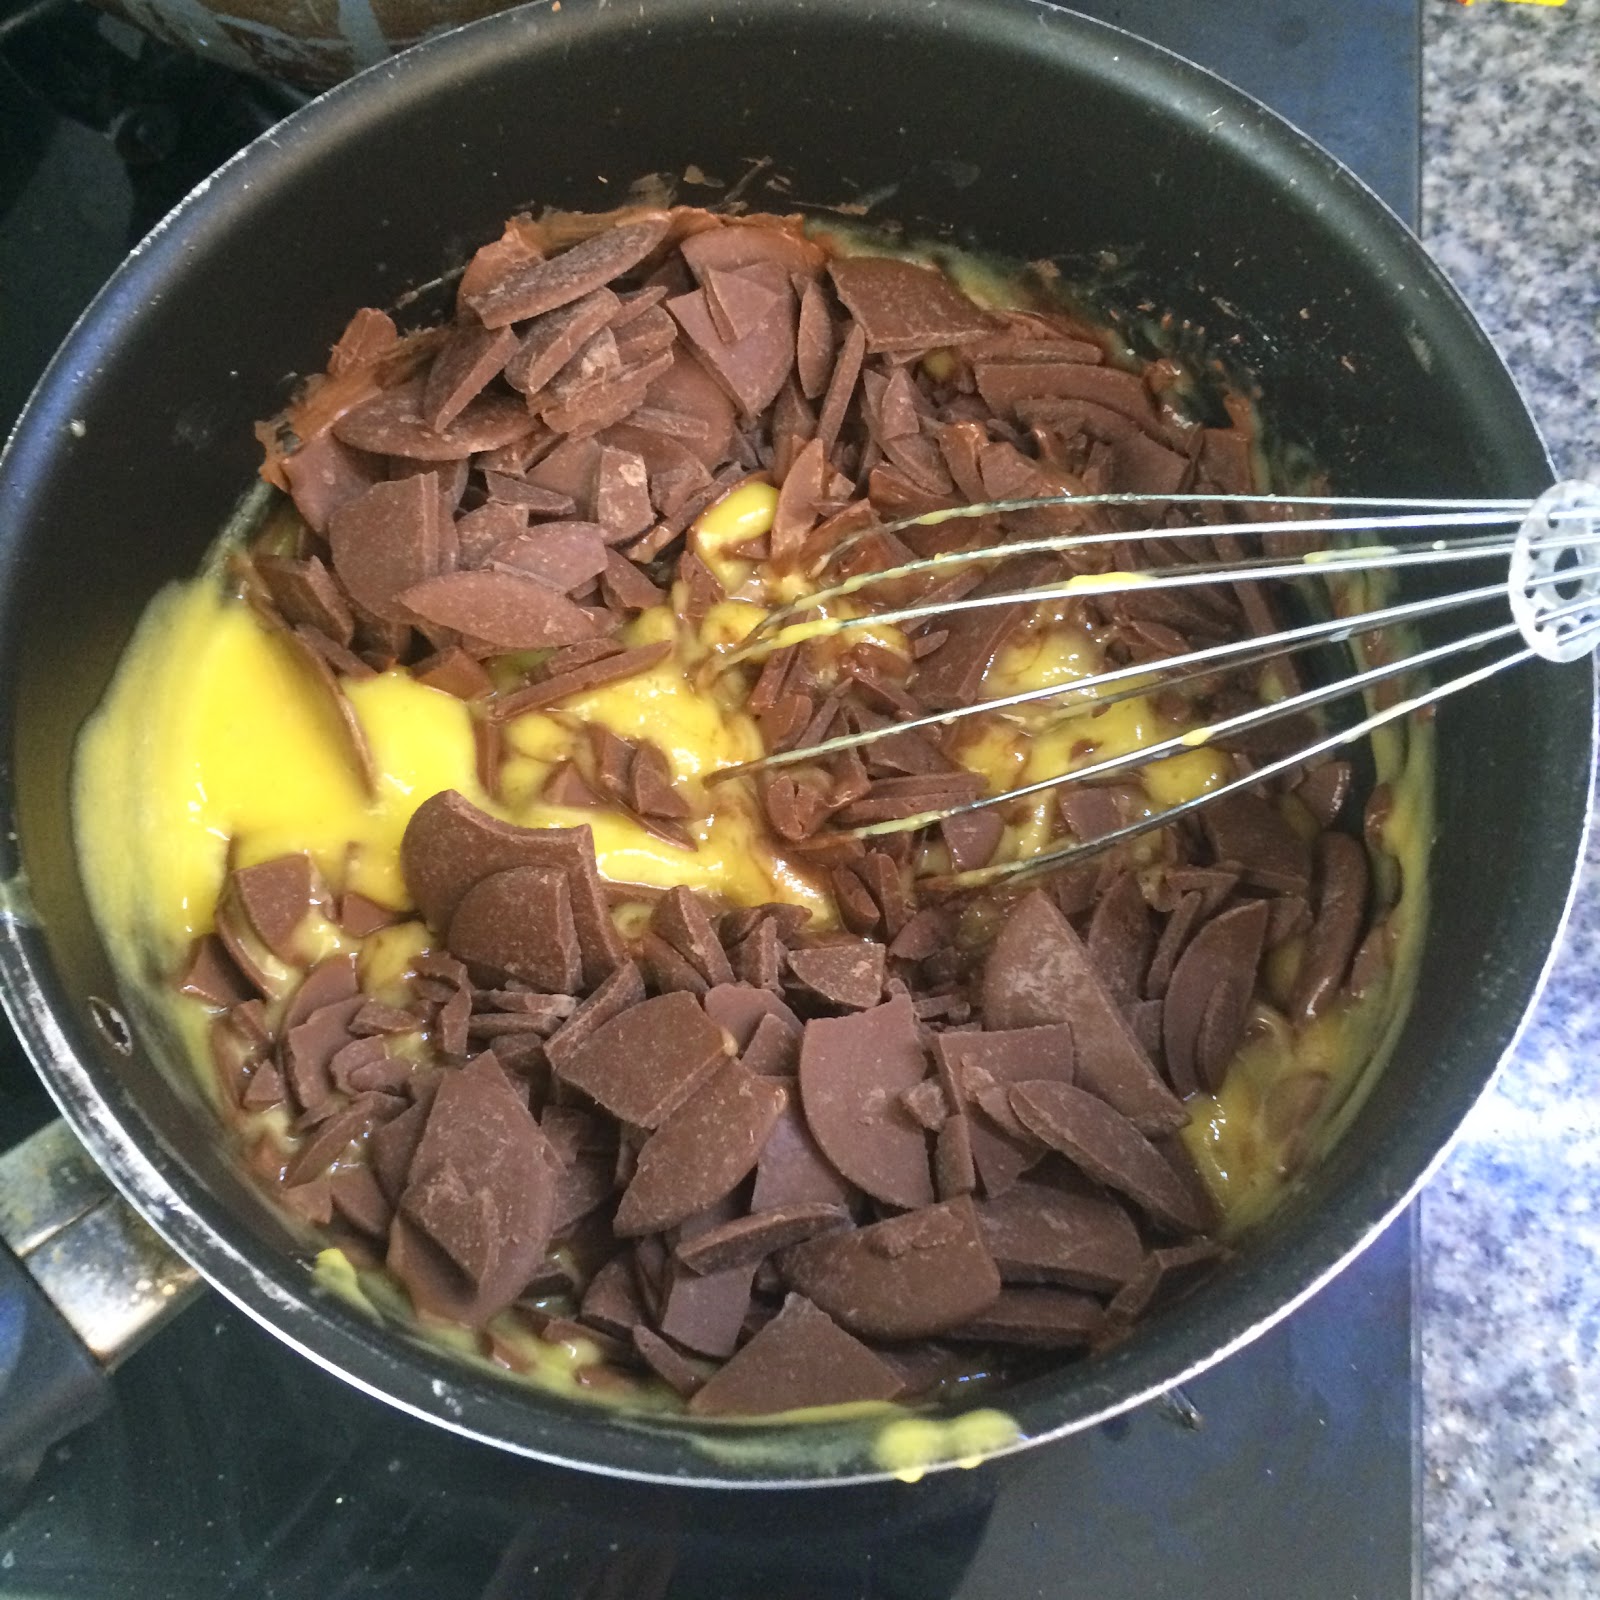
3. Stir in the chopped chocolate and blend gently with a whisk until it has all melted and there are no streaks. 
4. Allow the mixture to cool (approx 20mins) stirring occassionally.
5. Whip the cream until stiff peaks form then gently fold the cream into the chocolate mixture.

6. Pour the mixture over the cheesecake layer and smooth out the top.

7. Cover and freeze for at least 3 hours (again I left mine overnight).

Glaze/topping
250g dark chocolate (chopped)
1 cup cream

1. Remove tin from freezer and allow to sit for 15mins, wrap a warm towel around the tin and use a knife to separate the sides from the tin. Turn over onto your serving surface and gently manipulate the sides of the tin to release the cake from the pan.


2. Place the cream in a saucepan and heat until hot but not boiling. 
3. Stir in the chopped chocolate and then allow to stand for a minute before gently stirring the chocolate through the cream. Allow to cool, stirring occasionally.
4. Using a ladle slowly pour the chocolate over the top of the cake allowing it to drip over the sides.
5. Use a fork to dribble more chocolate on the top once partially set to create pattern and texture.

6. Store in the freezer until just before serving.


That's exactly where the cake is right now... Sitting in the freezer, waiting. With any luck I won't poison anyone and if it doesn't taste right people can at least say that it looked pretty!

Monday, 22 December 2014

Chicken and Asparagus Risotto

OK so I should start by saying thank you for your loyalty in coming back here after a "pause in proceedings" I haven't meant to neglect my blog like this but well... This year has been a little crazy. I've made it out the other side of things which is great so the cooking is back on track. Here is the first of a few posts that should be coming your way in the next little while!

Dinner is served

Ingredients
Chicken and Asparagus Risotto
Serves 4
Prep Time: 10mins Cook Time: 45mins

2 Chicken breasts
1 1/2L of Chicken Stock
2tsps sunflower oil
1 onion
2 garlic cloves (crushed)
2 cups risotto rice
1/2 cup dry white wine
1 bunch asparagus, cut into 4cm lengths
1 small head of broccoli
1 tsp grated lime rind
juice of a lime


1. Heat a frying pan over medium heat. Cook the chicken breasts 8mins per side (or until cooked through). Transfer to a plate, stand and cover for 5mins before slicing.
Food on the go!

2. Meanwhile bring the stock to the boil in a large saucepan over high heat. Reduce heat to low and then continue simmering until it is needed.

3. Heat the oil in a large, heavy based pan over medium heat. Add the onion, cook for 5 minutes or until soft. Do not allow it to go brown. Add in the garlic and the rice. Cook, stirring, for 1 minute. 

Cooking the rice without any liquid seemed a little weird,
but it worked!
4. Add the wine and bring to the boil. Stir and cook until the liquid has evaporated. Reduce heat to low. Add in 1 ladle of stock to the rice. Stir constantly with a wooden spoon until the liquid is absorbed. Repeat with the remaining stock, 1 ladle at a time.

5. When there is approximately 3 ladles of stock left, add in the asparagus and broccoli to the rice. Finish adding in the remaining stock as before, stirring gently. Add in the lime juice and rind. Serve topped with the chicken.
Absorbing the last of the stock

I think next time I would mix the chicken through with the risotto so that it could absorb some more of the flavour, that said, for a first try at risotto I was pretty chuffed with the results. I've never been a fan of risotto before now, in my head I always thought risotto was nothing more than badly cooked rice. The flavour of tonight's dinner though as me rethinking!

Feedback from Rory: "I really didn't expect you to get this right first time, but it's really good." 
Hmmm, thanks for the vote of confidence! 


Sunday, 2 February 2014

Potato and Spinach Frittata

It's Sunday, I had no intentions of leaving the house but I did want a decent breakfast. In the spirit of quick and easy meals here's breakfast!


 Potato and Spinach Frittata
Serves: 4
Prep Time: 5mins Cook time: 20mins

4 small potatoes, peeled and cubed
1tbsp olive oil
80g baby spinach leaves, chopped
1 garlic clove
2 small mushrooms finely diced
4 eggs
2 egg whites
Salt & Pepper to taste

1. Prepare potatoes and then boil in a saucepan for around 7mins until soft.
2. Drain the water off the potatoes and fry them lightly in the frying pan until slightly golden (around 5 mins)

3. Add in the garlic and mushroom and mix through. Then combine the spinach and cook for 2mins until the spinach is slightly wilted.

4. Whisk together the eggs and egg whites with a little salt and pepper, then pour into the frying pan.
5. Cook for 4mins until the frittata is set around the edge but runny in the middle and then transfer to a preheated grill and cook for a further 3 mins or until set and golden brown.

6. Cut into wedges and serve.


Next time I think I would be sure to add some onion just for a bit more flavour but for a tasty breakfast this is a winner.

Chilli Jam Chicken

It's a pretty busy time of year right now and as a result meals are either slow cooked (thanks to Rory) or they have to be something quick... Recipes that take hours just aren't on my agenda. 
Dinner in 15mins!
Chilli Jam Chicken
Serves: 4
Prep Time: 15mins Cook Time: 15mins
400g chicken breasts cut in strips
2 stalks of spring onion diced
1 yellow capsicum (pepper) sliced
1 carrot sliced
50g snow peas
150g broccoli
2 tsp fish sauce
1-2 tbsp chilli jam
50g cashews
1 bunch of vermicelli noodles

1. Heat a small amount of oil in a wok over medium heat. Stir fry the chicken for 3-4 mins until golden brown. Remove from heat and keep covered.
2. Place the wok back on the heat and add a little more oil. Str fry the vegetables until tender.
3. Add the fish sauce and chilli jam and stir-fry for 3-4 mins. Add the chicken back into the wok and add half the cashews. At the same time place the noodles into a pot of boiling water, after 4 mins stir them through the chicken and vegetable mix.
Dinner in 15mins means that I am also not thinking about
taking photos of the process...
Oopps, here it is dinner on the go!
4. Serve and top with remaining cashews.

The flavour in this was absolutely delicious but it did lack some of the kick that we were hoping to get from the chilli jam. Next time I would double the jam or maybe add some additional fresh chilli. It may have just been that the jam we had wasn't particularly strong. Regardless this dish will definitely surface again.

Sunday, 8 December 2013

Rudolf Tartlets

Last night was Noche de las Velitas so I celebrated with my Colombian family. These certainly aren't typical for this night but last night was all about the young and young at heart so...

Rudolf Tartlets
Serves: 32
Prep Time: 45mins (to be honest I'm not sure) Cook Time: 5mins plus refrigeration time
*The original recipe for these called for a type of biscuit that I can't find here that you pop in the oven to heat through and then press into a muffin tin to make the right shape. I tried this using the only biscuit I thought might be  reasonable substitute but in the end I decided they were too big (see below) so instead I used small tartlet cases.
32 small tartlet cases
300g chocolate
3/4 cup cream
100g fondant
32 red tic tacs (or other suitable nose)
64 green or blue 100's and 1000's
64 pretzels

1. Place tartlet cases onto a baking tray.
2. Pour cream into a saucepan and heat over low heat until just boiling, add in the chocolate and stir until smooth
3. Spoon 1tbsp measures of chocolate into each case.

4. Roll small balls of fondant and insert a tic tac inside each one to make the noses, place on top of the chocolate
I'm a fan of prep that can be done whilst sitting on the couch!
5. Roll smaller balls of fondant (as evenly sized as possible) and press a 100 & 1000 into each one and place on top of the chocolate for the eyes.
My original idea was to just draw a little black dot on as an eye,
but Rory had this suggestion and I felt like I had to try it.
Warning it takes some time!
6. Place the tray into the fridge to allow the chocolate to set slightly
7. Cut pretzels (there was a lot of breakage in this part of the process) to form antler shapes and then press into the top of the chocolate to form antlers.
8. Return Rudolf to the fridge until completely set

You could use a lot of other things to make the features of your reindeer, I chose these because I had them in my house and I was able to form the fondant to be a suitable size for the nose and eyes, but the options are endless.

These were great fun and by far the cutest dessert I have ever made. They were well received last night (or so I assume based on the empty tray I was able to bring home).

Mustard Pork with Roasted Pears

For the love of pork and pear... When I first found this recipe I was really excited, two of my favourite foods meshed together in one delicious bundle that takes about 30mins to make, it doesn't get any better than this.


Roasted Pear Salad
Serves: 4
Prep Time: 5mins Cook Time: 25mins
4 Beurre Bosc Pears cut into 2cm thick wedges
2 Red onions cut into wedges
Olive Oil Spray
2tbsp Balsamic Vinegar
100g Baby Spinach 
1 avocado thinly sliced

1. Preheat oven to 200C. Line a baking tray with non-stick paper.
2. Place the cut pears and onion onto one of the trays, spray with oil and drizzle with half of the vinegar.
3. Bake for 25mins or until the pears are golden and tender
4.Place the pear, onion, spinach, avocado and remaining vinegar in a bowl and toss to combine.

Mustard and Rosemary Pork
Serves: 4
Prep Time: 5mins Cook Time: 10-11mins
4 Pork Loin steaks
2 tbsp Wholegrain Mustard
2 tsp fresh chopped Rosemary
1 tsp Lime rind
1 tbsp Olive Oil

1. While the pears and onion are baking, combine the mustard, rosemary and lime rind in a bowl. 
2. Heat the oil in a large non-stick frying pan over high heat. Cook the pork for 2mins on each side.
3. Remove Pork from heat and spread the mustard mixture on one side of the steak.
4. Transfer steaks onto a second baking tray and bake for 6-7mins until cooked through. 

This far exceeded my expectations. I love a meal that can be made in under 30mins!

Sunday, 15 September 2013

One Year On...

So I actually missed the 1 year anniversary of my bucket list. I had intended to write this post then, but at the time I was preoccupied with making Stegabell - a Birthday cake for a friends "21st"! 

I'm not going to write a separate post about her, she follows the same recipe as my Turkey Cake, but if anyone is interested to find out about the making of Stegabell, give me a shout and I'll see what I can do to explain it a bit better, though don't expect an explanation of why anyone would ask for a Stegosaurus/Tinker bell cake, I don't know if I can do justice to how we came upon this idea...


Anyway, we're a year on from where this all began so I thought it was time for a bit of an update...
Meals

Breads


Desserts


Fun Stuff

EXTRAS!

Over the year I found a few other things that seemed list worthy so I added those on, here they are

What next...

I still have a few things that need my attention, but here's a new list with a whole lot more added on (you can see I have left on the stuff I still haven't made from last year). I also own a slow cooker now, so I think as I experiment with that I will be sharing a bit more...

Meals

  • Egg Rolls - I think I may have just forgotten about these... I will get there I promise!
  • Asian Style Beef Pot Roast
  • Honey Lime Tilapia
  • Chilli Jam Chicken
  • Honey Chicken
  • Chicken and Asparagus Risotto
  • Mustard Pork with Roasted Pears
  • Proscuitto and Eggplant Bake
  • Potato and Spinach Frittata
  • Balsamic Roast Vegetables
  • Broccoli Bake
  • Veggie Burger

Breads


  • Sourdough - I haven't braved this yet, give me time I'll get there I promise!
  • English Muffins - I cheated and bought these when I made eggs benedict, I will make them though
  • Crumpets - I've avoided this as I just don't know that they'll live up to my childhood memories of crumpets
  • Peshwari Naan - Without a tandoor oven this will never work out as well as I would hope for but it stays on the list
  • Focaccia
  • Zucchini Bread
  • Easter Bread
  • Pumpkin Bread
  • Herb and Garlic Pull-apart

Desserts

  • Chocolate Meringue Pie - I haven't got to this, I got distracted by mini LMP's... It's coming though
  • Rhubarb Pie - I'm still on the hunt for rhubarb (I've seen it a few times but never when I've had time to make a pie)
  • Key Lime Pie - Again I blame the LMP...
  • Pear Tarte Tatin

Fun Stuff

  • Rudolf Tartlets - I was away at Christmas time, I will have to try again this year
  • Cream Cheese Penguins - Anyone having an Antarctica Party soon?
  • PiƱata Cookies
What else is there that I've forgotten? Ideas/suggestions are more than welcome!

Sunday, 7 July 2013

Sushi

I love sushi and getting hold of sushi here is easy, but it's holidays so I don't need easy. I needed a challenge, so here from my very own kitchen a variety of sushi rolls...


Sushi Rice
Makes: 6-9 Rolls
Prep Time: 2 mins Cook Time: 10 mins
3 cups sushi rice
3 & 1/2 cups water

Sushi Seasoning
½ cup of rice vinegar
2 tablespoons of sugar
2 teaspoons of salt
1. Wash the rice in running water for 1-2 minutes until the water runs clear. After you are done washing, take the rice and place it in a pot, add the water.
2. Cook on high heat at first, stir every minute or two, until the water boils. Then, lower the heat to low and cover the pot. Stop stirring.
3. While the rice is coking prepare the sushi seasoning by placing all ingredients in a small pot on medium heat and stir until the salt and sugar have dissolved.
4. After 6-8 min, check the water level - If there is no more water the rice is ready. If not, check back every minute, making sure not to burn the rice at the bottom.
5. Use a wooden spoon to remove the rice from the pot. Do not scrape the rice out of the bottom of the pot (the rice at the bottom will be dry and won't taste as good). Place the rice into a plastic or wooden bowl to chill. Pour the sushi seasoning over the top and stir through.

The sushi you make is up to you. I did both inside out and regular rolls and created a range of fillings based on what Rory and I like.


Spicy Tuna

Tuna steak
3tsp Sriracha sauce
1/2 tsp Sesame oil
1 sheet of Nori
1/2 cup sushi rice

1. Combine the Sriracha sauce and sesame oil in a bowl.

2. Place the nori shiny side down on the bamboo mat, cover with rice - slightly dampening your hands (1/4 cup water with 2 tsp rice vinegar) will make spreading the rice much easier as it won't stick to your fingers.

3. Lay the cubed strip of tuna across the rice and top with the sauce.

4. From the bottom end, start rolling the nori sheet over the filling tightly and firmly with the bamboo mat until the bottom end reaches the nori sheet. Squeeze tightly. 


5. Gently and carefully unfold the mat, leaving the roll tightly tucked. Reposition your hands on the mat to roll the sushi over further. At this point he bamboo mat will have overhang, be sure to keep this folded up so that it doesn't get trapped inside the roll.


6. Slice the roll into individual pieces.

*I had looked at a few recipes which suggested only using half the nori sheet per roll, but I found this made a very small roll. With the section I cut off I tried again and was able to create a spiral finish which looked much better than the squished up original.

Philadelphia Roll
Salmon Fillet
Cream cheese
Seasame seeds
1 sheet of Nori
1/2 cup sushi rice


This roll was an inside out version. 

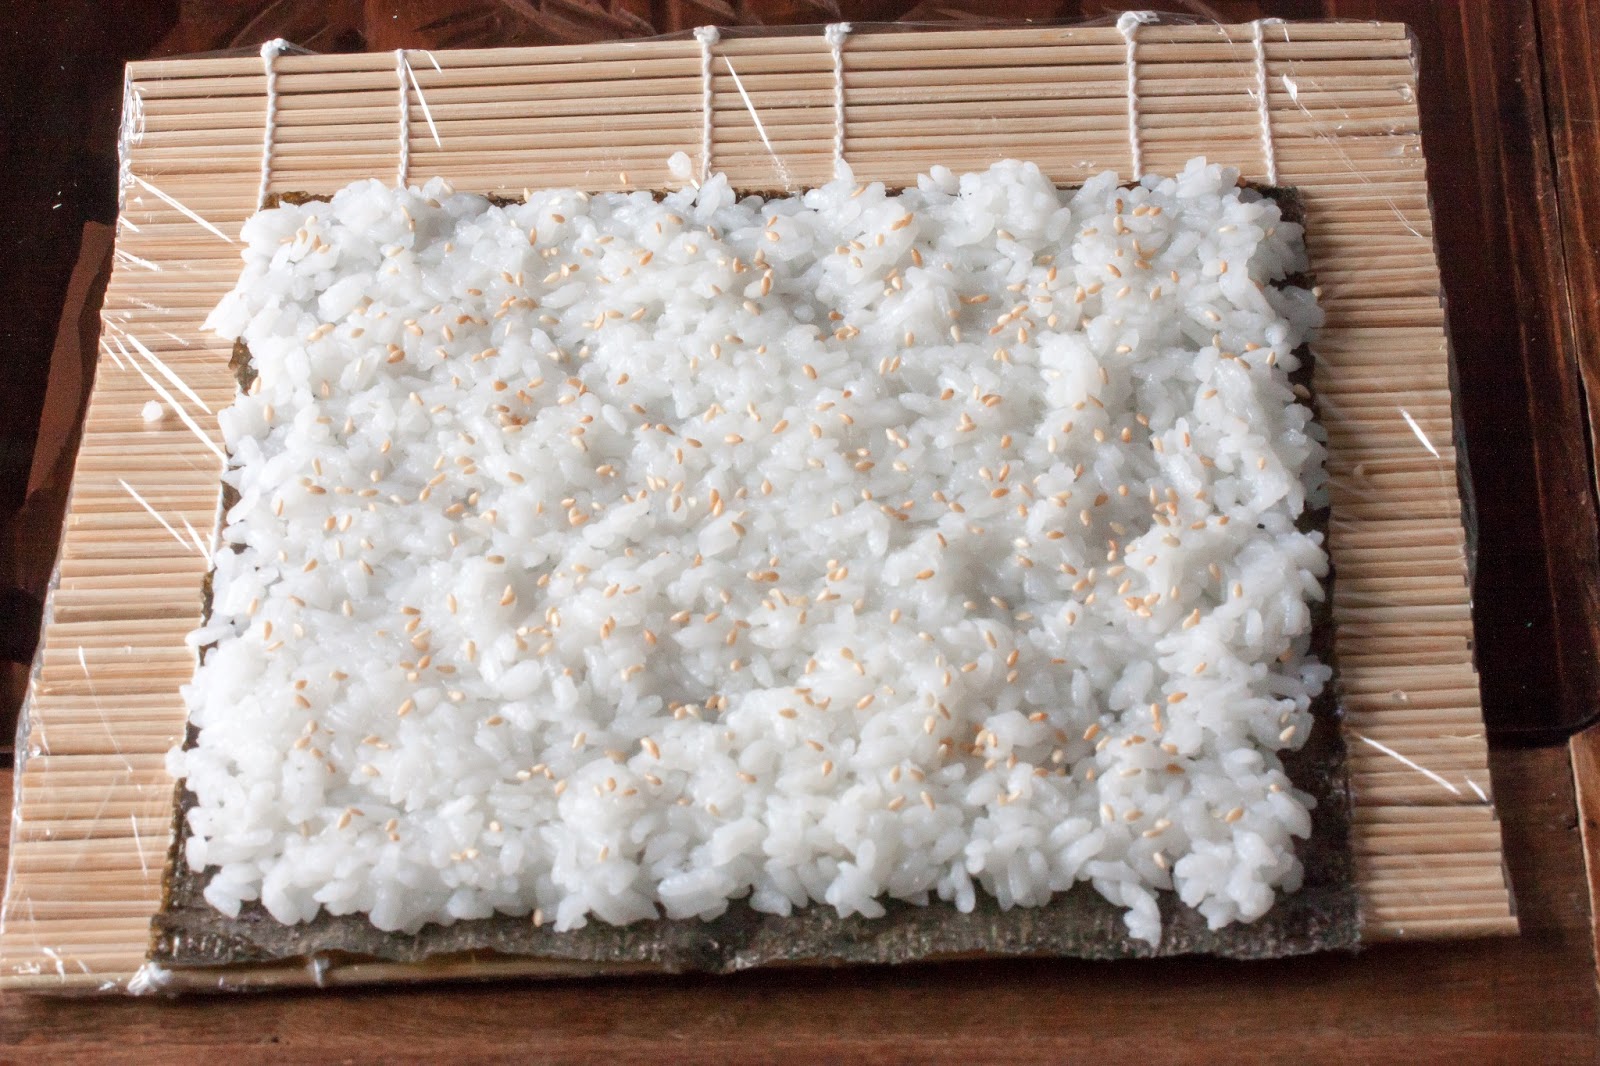
1. Lay the nori sheet down and cover with rice. Sprinkle roasted sesame seeds over the rice and then flip the nori sheet over so the rice is in contact with the bamboo mat.(Cover the bamboo mat with cling film for this one so you don't spend hours cleaning squished rice out of the gaps in the mat) 
2. Lay the salmon onto the nori and then spread cream cheese along one side.
3. Roll, cut and enjoy

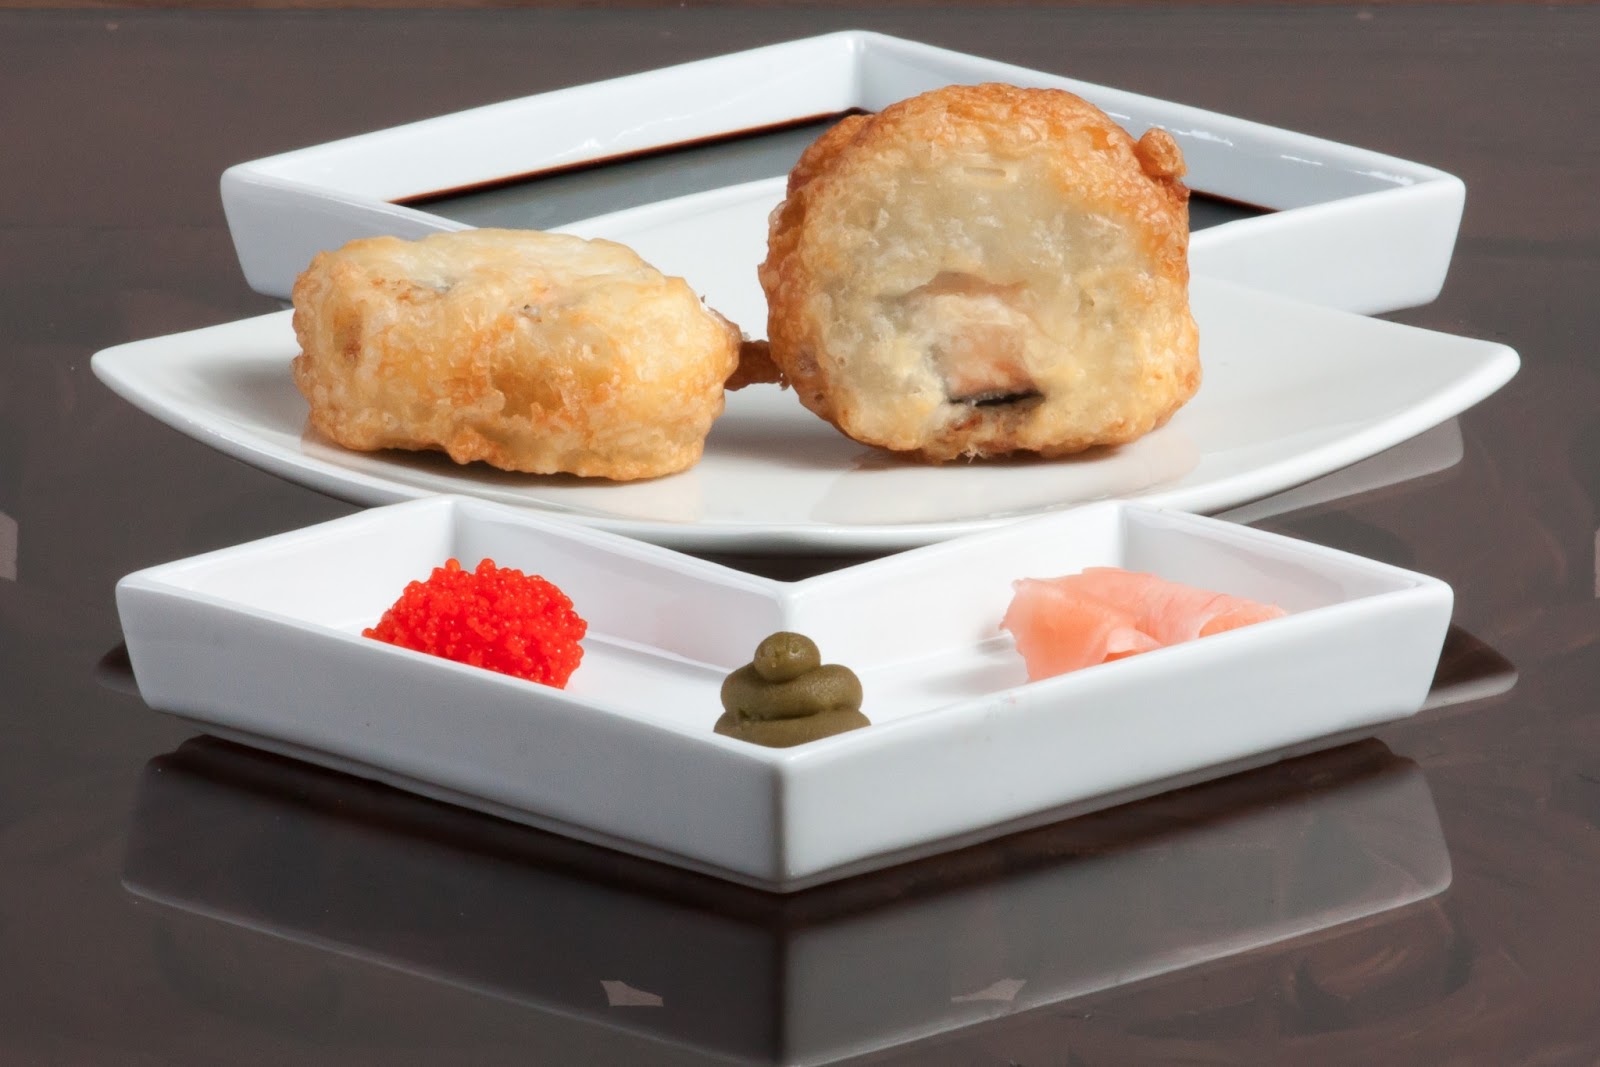
On my trip to collect supplies for the sushi I found tempura batter mix so as an experiment we fried half of the philadelphia rolls in tempura batter. 

1. Dip prepared roll in tempura batter flour and then dredge through the batter mix. 
2. Shallow fry in oil (170 degrees).


Tropical Roll
Tempura Salmon
Mango slices
Avocado slices
Cucumber slices
Japanese mayonnaise
Toasted coconut
Sushi rice 
Nori

1. Pepare nori and rice as per philadelphia, sprinkling instead with roasted coconut. 
2. Flip the nori sheet over and lay all ingredients down onto the seaweed.
3. Roll, cut and enjoy!


Spicy Salmon
Salmon Fillet
Salmon Roe
Sriracha sauce (as per spicy tuna)
Wasabi

1. Prepare the nori as per the spicy tuna recipe.
2. Lay down the salmon fillet, add the salmon roe, sriracha sauce and spread on some wasabi.
3. Roll, cut and enjoy!

This sushi was amazing (even if I do say so myself). I may never order sushi out again!