So in my last blog post I promised something big and exciting was brewing and now that Thanksgiving has been and gone and I successfully managed to keep my Thanksgiving dessert a surprise for my host, it's time to share what I did.
You may or may not have seen on my original blog post that I have listed - Roast Turkey. A good friend of mine here in Bogotá promised on that posting, she would teach me how to make it, she even suggested I could prepare the turkey for this year's Thanksgiving... I suggested as it's her last one here, she probably didn't want to put the biggest event on the American Calendar into my hands. That said, after receiving this year's dinner invitation I knew I wanted to do something special. I began searching for Thanksgiving dishes and stumbled upon the idea of a cake made to look like a roast turkey. How could I say no, there it was; a great and creative dessert that also let me cancel from my list the one thing I'm most worried about cooking!
I checked with Susan that if I brought a "clever" dessert that it wouldn't lower the quality of her Thanksgiving dinner party and she assured me she was up for something that was interesting and (I hoped) tasted good. And there began my journey to this...
 |
| Turkey Cake, 100% edible |
Turkey cake
Serves: Millions (ok, not quite but there was a whole lot of cake...)
Prep Time: DAYS! Bake Time: HOURS
Peas and Carrots
500g fondant
food colouring
500g fondant
food colouring
I rolled these from fondant that I bought and coloured as desired. I wouldn't recommend using liquid food colouring but it was all I had so I made it work and it ended up looking much better than I thought.
 |
| If I never roll another pea in my life I'll be happy. This was only half of what I made! |
Drumsticks and Wings
6 cups Rice Krispies
10oz. regular marshmallows
30g butter
250g fondant
1. Place marshmallows and butter in a bowl and microwave until the marshmallows have all melted.
2. Stir in the Rice Krispies.
3. Cover hands lightly in butter and then take scoops of the mix and shape as desired.
 |
| I made double just in case of breakage |
5. Remove from fridge and let them return to room temperature before covering them in fondant and leaving for a day or two to air dry The mix will become very fragile once it's back at room temperature so handle them as little as possible when covering in fondant. I could have left them uncovered but I really liked the texture this created and I was worried that they wouldn't have held their shape one they were out of the fridge for too long.
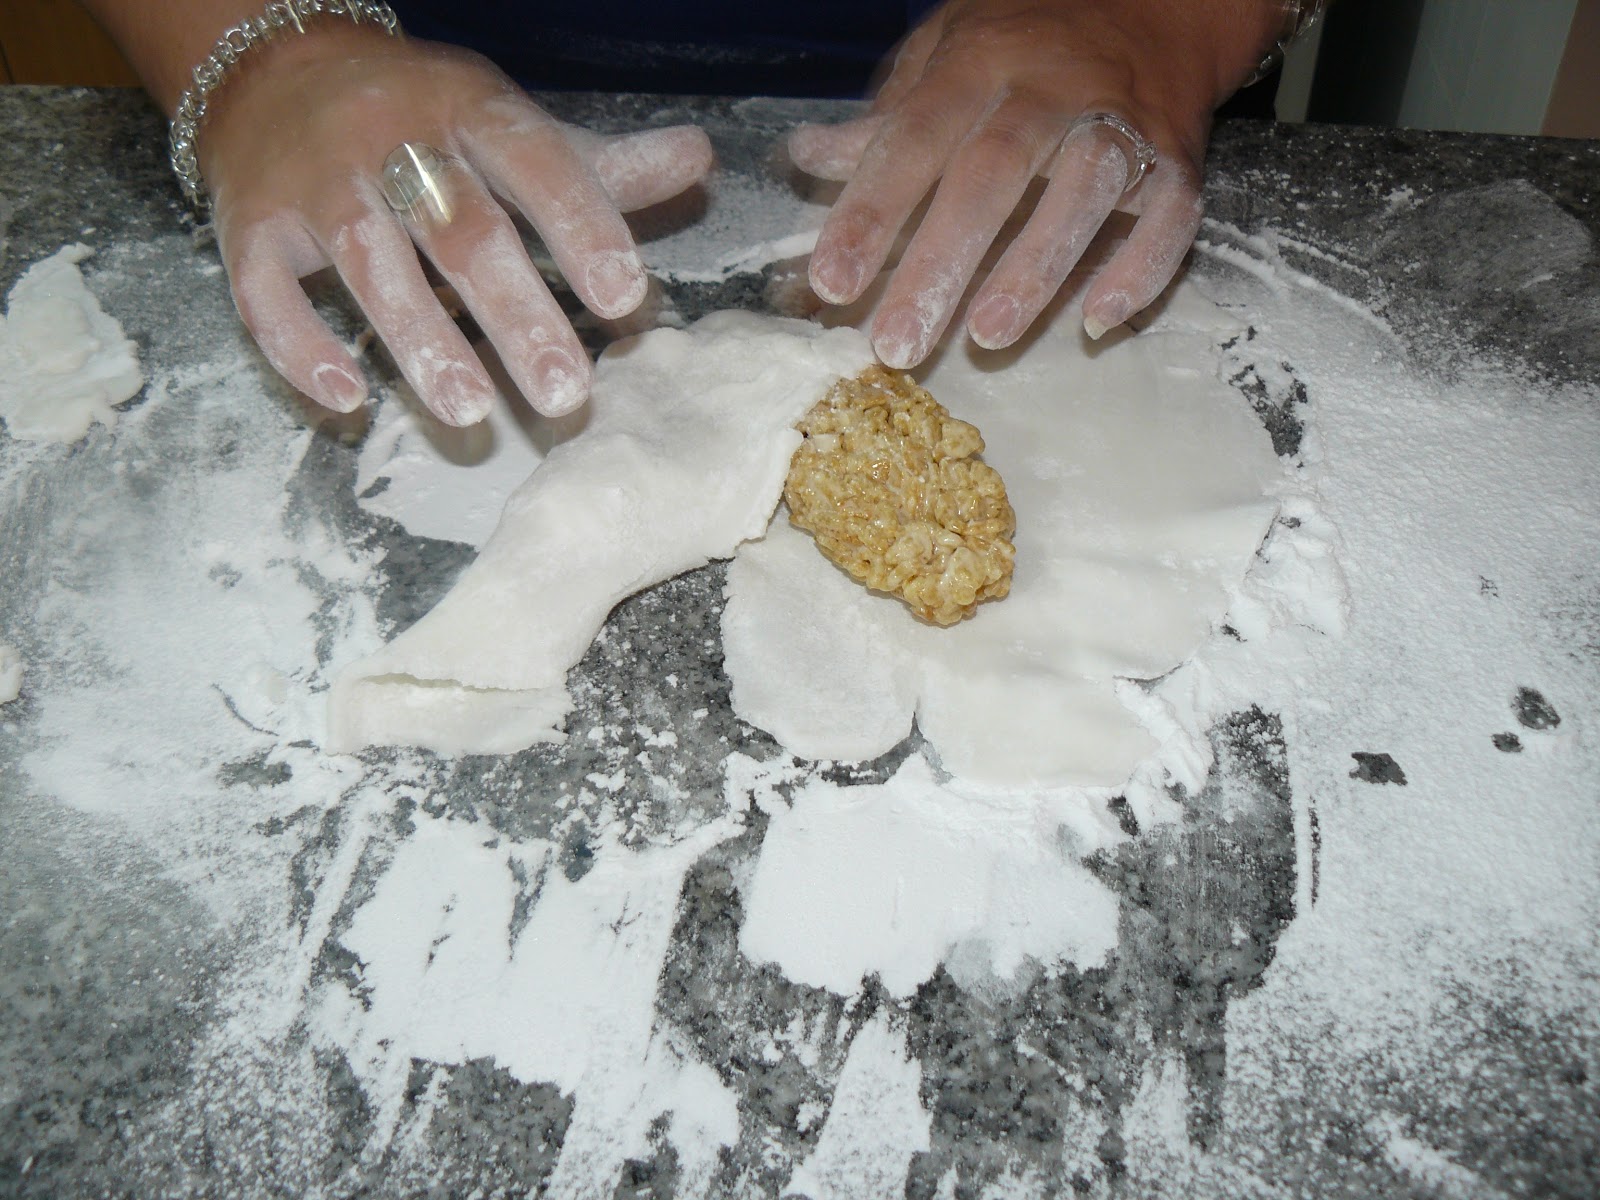 |
| Wrapping in fondant |
 |
| Perfect parts! |
White Chocolate Mud Cake
(I cooked 2 of these to make the body, I managed to find an oval baking tin which made my life a million times easier, however a rectangle would work just as well, it just needs extra carving)
(I cooked 2 of these to make the body, I managed to find an oval baking tin which made my life a million times easier, however a rectangle would work just as well, it just needs extra carving)
300g unsalted butter
300g white chocolate melts
280ml water
2 3/4 cups plain flour
1 cup self-raising flour
2 cups sugar - caster sugar would have been ideal but isn't easily found here, so I put mine in a zip lock bag and attacked it with a rolling pin to try and get it a bit finer.
3 eggs
pinch of salt
1/2tsp vanilla extract
1. Preheat oven to 180C. Grease and line the tin with baking paper
2. Put the butter, chocolate and water into a saucepan and stir over low heat until the chocolate has melted, then remove from heat.
3. Sift the flour into a bowl then add the sugar and salt. Add the melted chocolate mixture, eggs and vanilla stirring until completely combined.
4. Pour the mix into the tin and bake for 1 hour and 30 mins (or until a skewer poked into the centre comes out clean)
5. Leave the cake in the tin until completely cooled then turn out onto a rack.
 |
| I was much happier with this than I thought I would be. |
Ganache
500g milk chocolate
250g cream
1. Put the chocolate into a saucepan over low heat and stir in the cream until it has all melted into a consistent texture.
2. Set aside to cool and thicken.
 |
| I went with milk chocolate so my turkey still had white and dark meat! |
500g unsalted butter
4 cups icing sugar
colouring I used brown, yellow and red to get the desired colour
1. Beat the butter using an electric mixer until smooth
2. Gradually add in the icing sugar (my original recipe used a lot more icing sugar than this, but I stopped when I had a consistency that I was happy with)
3. Add colouring until desired colour is achieved (I had thought my icing was a bit light but happily I can report overnight it darkened to the perfected roast turkey tinge!
Assembly
1. Carve the top, bottom and side off the cakes
 |
| Carving |
2. Cut down the centre of both cakes, then take half of one cake and cover the top surface with ganache
 |
| Cutting |
3. Raise both halves of the first cake and press them together using the ganache to hold them to one another. (Lift onto your serving tray/plate at this point as it will be too hard to move later.)
 |
| This was a stressful time so the only photo is once it's together. |
4. Using the second cake, cover both halves with ganache and lift onto either side of the first arches.
 |
| Refer to the caption above |
5. Use the knife to carve the arches into more of a turkey shape (thanks to my oval tin I didn't need to do much of this, just a little tapering in at the back and leveling off the different layers
 |
| Getting things to the right shape... |
6. Cover the body in butter cream icing, creating as smooth a finish as possible
 |
| Icing it up! |
7. Press the wings and legs onto the sides (I contemplated using skewers to be sure they'd hold but in the end didn't bother) Then cover in a thin layer of butter cream icing
 |
| Adding the wings and legs |
8. Place peas and carrots around the base of the turkey (I also used these under the drumsticks to try and help support them and stop them from falling/sliding down my cake).
9. Use cake crumbs from anything you carved off to make the stuffing at the back
 |
| Covering the wings and legs with icing to get them the same colour as the body. Complete with peas and carrots to decorate! |
9. Use cake crumbs from anything you carved off to make the stuffing at the back
 |
| I knew all those cake recipes I tried and didn't like would come in handy. :) |
 |
| All covered up and ready for transporting to dinner the next night! |
Best.Turkey.Ever!
ReplyDeleteNawww, you are too kind. I would definitely say the same for yours! Especially with that divine gravy and most incredible congealed salad! Thank you for a most memorable night!
ReplyDelete